These are instructions on how to setup your iPhone for Google Sync of Contacts, Calendars, and Push Gmail.
Please note Google Sync is only supported on iPhone OS 3.0 and above.
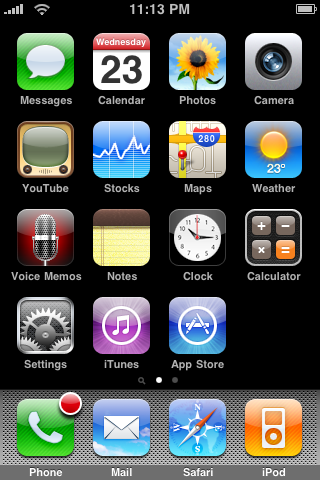
Step One
Press to select Settings from your Springboard.
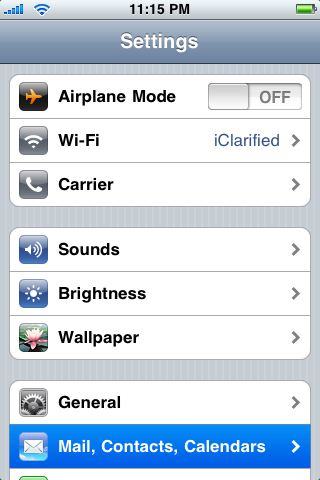
Step Two
Press to choose Mail, Contacts, Calendars from the Settings Menu.
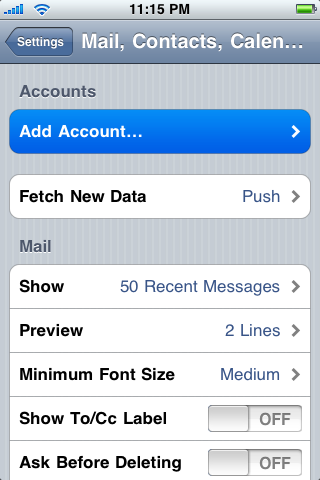
Step Three
Tap to select Add Account...
Step Four
Select Microsoft Exchange from the list of account types.

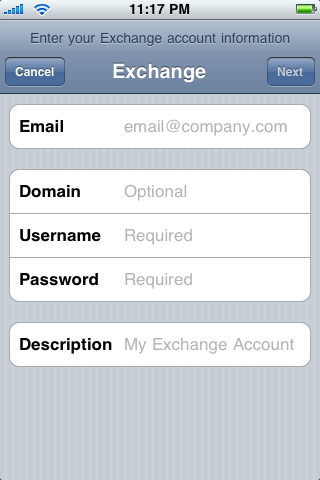
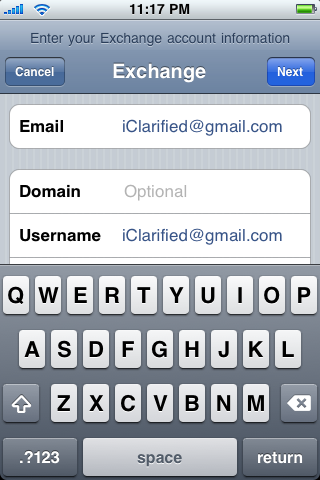
Step Five
Enter your account details... Input your complete Gmail address in the Email field. Leave the Domain field blank. Enter your full Gmail address in the Username field. Input your Gmail password in the Password field. Once you have filled in all the fields you can press the Next button at the top right of the screen.
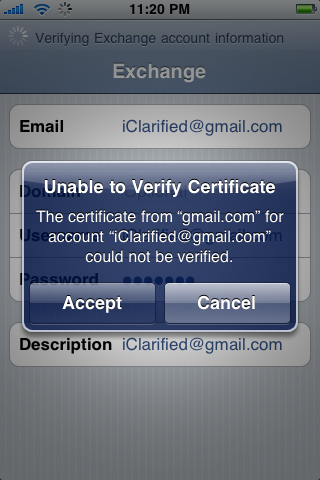
Step Six
If you receive an Unable to Verify Certificate dialog press the Accept button.
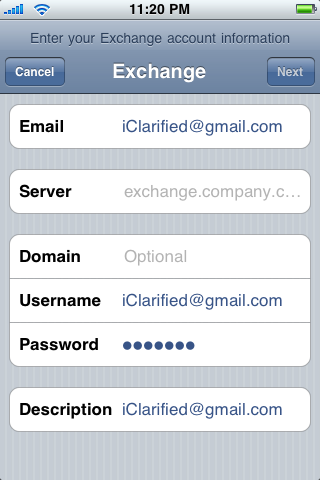
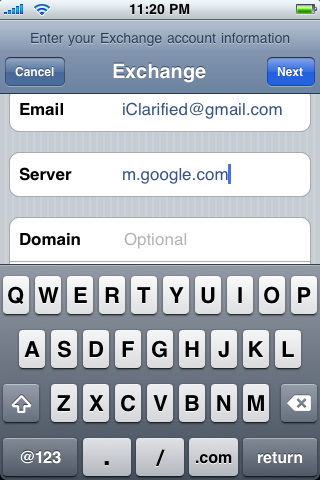
Step Seven
A new field called Server will appear. Enter m.google.com into this field then tap the Next button at the top right of your screen.
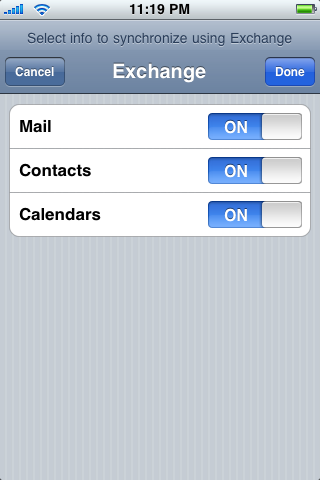
Step Eight
You can now choose which Google services you would like to sync. Set the switches then press the Donebutton at the top right of the screen.
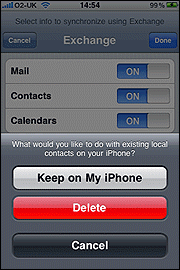
You may be asked what to do with the with existing local contacts on your iPhone. If you want to sync only the My Contacts group, you must choose to Delete Existing Contacts during the Google Sync install when prompted. If you choose to keep existing contacts, it will sync the contents of the "All Contacts" group instead.
Step Nine
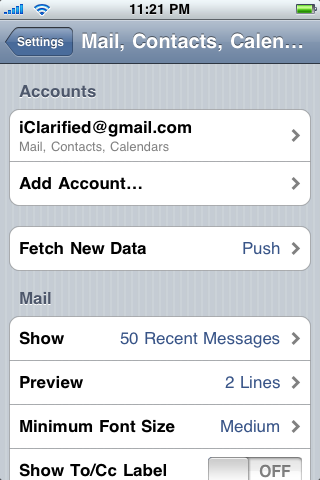
Congratulations, you have successfully setup Google Sync for your iPhone. Synchronization will begin automatically if you have Push enabled on your phone. You can also open the Mail, Calendar or Contacts app and wait a few seconds to start a sync.
Please note Google Sync is only supported on iPhone OS 3.0 and above.
Step One
Press to select Settings from your Springboard.

Step Two
Press to choose Mail, Contacts, Calendars from the Settings Menu.

Step Three
Tap to select Add Account...

Step Four
Select Microsoft Exchange from the list of account types.

Step Five
Enter your account details... Input your complete Gmail address in the Email field. Leave the Domain field blank. Enter your full Gmail address in the Username field. Input your Gmail password in the Password field. Once you have filled in all the fields you can press the Next button at the top right of the screen.


Step Six
If you receive an Unable to Verify Certificate dialog press the Accept button.

Step Seven
A new field called Server will appear. Enter m.google.com into this field then tap the Next button at the top right of your screen.


Step Eight
You can now choose which Google services you would like to sync. Set the switches then press the Donebutton at the top right of the screen.

You may be asked what to do with the with existing local contacts on your iPhone. If you want to sync only the My Contacts group, you must choose to Delete Existing Contacts during the Google Sync install when prompted. If you choose to keep existing contacts, it will sync the contents of the "All Contacts" group instead.

Step Nine
Congratulations, you have successfully setup Google Sync for your iPhone. Synchronization will begin automatically if you have Push enabled on your phone. You can also open the Mail, Calendar or Contacts app and wait a few seconds to start a sync.

No comments:
Post a Comment